
How to Measure Roof Pitch: 4 Accurate Methods (2026 Guide)
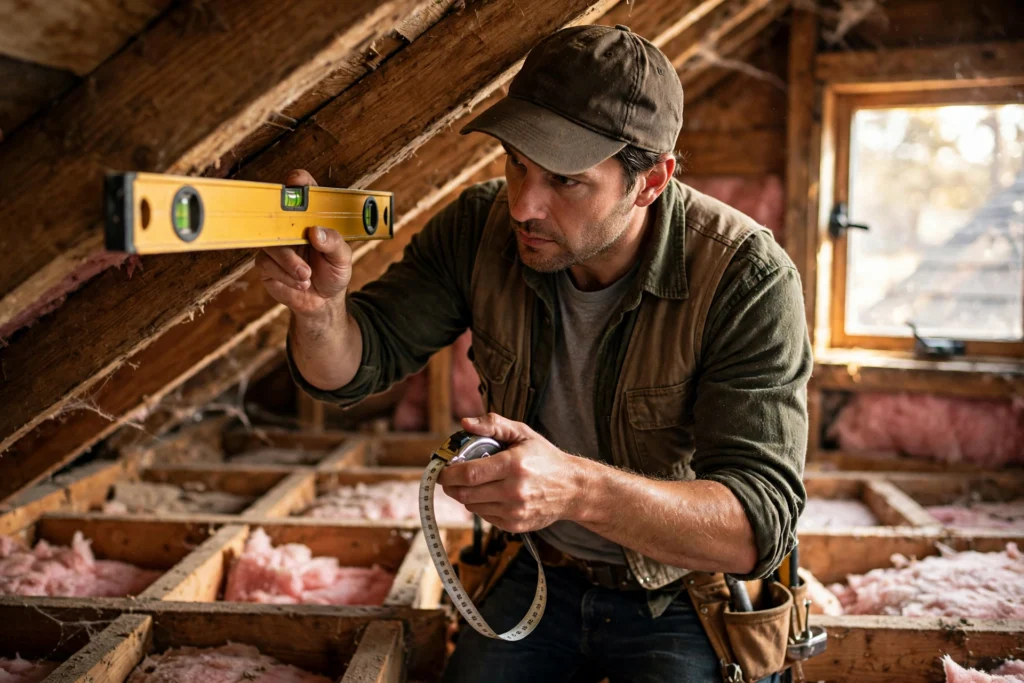
Your roofer will ask for it. Your material supplier will ask for it. Your permit application may ask for it. Roof pitch — the steepness of your roof, written as rise over a 12-inch run — is the one number every roofing conversation starts from, and most homeowners have never measured it. The good news: learning how to measure roof pitch takes about ten minutes, a level, and a tape measure, and you never have to climb on the roof to do it.
The short answer: roof pitch is how many inches your roof rises for every 12 inches of horizontal run. To measure roof pitch, hold a level horizontally against the underside of a rafter in your attic, mark 12 inches along the level, and measure straight up from that mark to the rafter. If the gap is 6 inches, your pitch is 6/12. That is the whole method — the rest of this guide covers the details, the other three ways to do it, and what the number means once you have it.
What roof pitch actually is
Before you measure roof pitch, it helps to know exactly what you are measuring. Roof pitch is a ratio: vertical rise divided by horizontal run, expressed as X/12. A 4/12 roof rises 4 inches for every 12 inches it runs horizontally. A 12/12 roof rises 12 inches over the same distance, which makes a perfect 45-degree angle. The same slope can also be written as an angle in degrees or as a percent gradient — 6/12 is 26.57 degrees and a 50 percent gradient — but X/12 is the format roofers, building codes, and manufacturers use in the United States, so it is the format worth learning. If you want the full background on what pitch means and how it relates to roof gradient, our guide to roof gradient covers the definitions and the conversion math in depth.
One thing trips people up the first time they measure roof pitch: the run is always measured horizontally, never along the slope. Twelve inches of run means twelve inches of level, horizontal distance — not twelve inches of rafter, and not twelve inches of shingle surface. Every method below follows that rule, and every mistake in the troubleshooting section at the end comes from breaking it.
What you need
You do not need special tools. To measure roof pitch from the attic, the only essentials are a level at least 12 inches long (a 24-inch level is easier to hold steady) and a tape measure. A pencil helps for marking the 12-inch point. For the ground method, you need the same level plus a clear view of a gable end. For the phone method, you need a phone with a level or angle app — the Measure app on an iPhone, or any bubble-level app on Android. A helper is useful but not required — to measure roof pitch from the attic is genuinely a one-person job.
Method 1: From the attic (safest and most accurate)
This is the method roofers recommend first, and it is the best answer to how to measure roof pitch for most homeowners, because you stay inside, on solid footing, and you are measuring the rafter itself — the structure that defines the slope — rather than the finished roof surface on top of it.
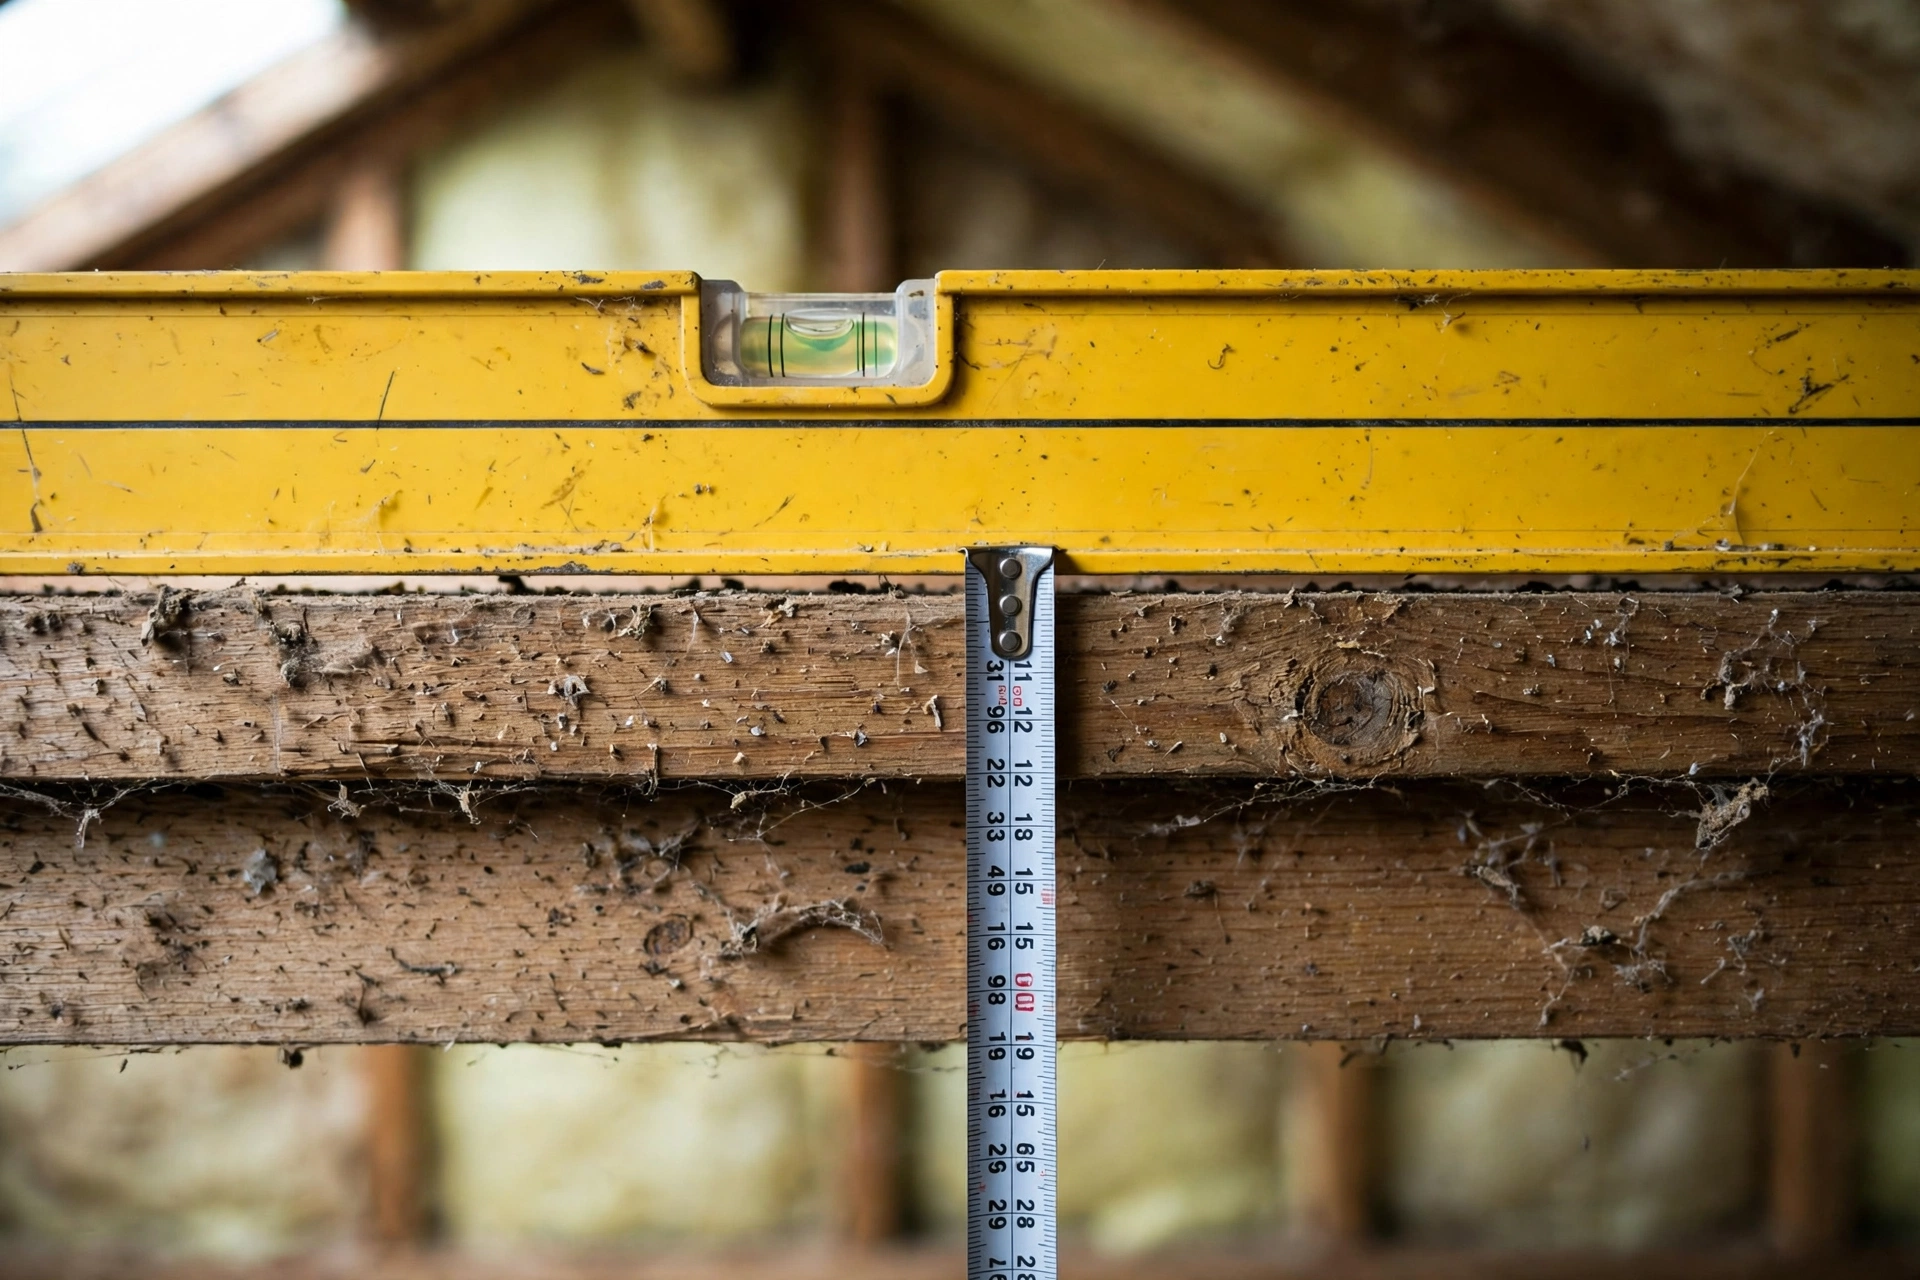
Go into your attic with your level, tape measure, and pencil. Find an exposed rafter — the sloped timber running from the ridge down to the eave. If your attic is floored, stand where you can reach a rafter comfortably; if it is not floored, step only on the joists and bring a board to kneel on. Hold the level against the underside of the rafter so that one end touches the rafter and the level reads perfectly horizontal. The bubble must sit dead center — a level that is even slightly off will give you a wrong rise.
Once the level is horizontal and touching the rafter at one end, mark the 12-inch point along the top edge of the level. Then measure straight up — vertically, not at an angle — from that mark to the underside of the rafter. That vertical distance, in inches, is your rise. If it measures 6 inches, your pitch is 6/12. If it measures 4 and a half inches, your pitch is 4.5/12 — fractional pitches are common, and there is nothing wrong with reporting one.
When you measure roof pitch, take the reading at two or three different rafters and compare. They should agree within a quarter inch. If they do not, one of your readings was off — usually the level was not quite horizontal, or the tape was not quite vertical. Repeat until two readings match. That agreement is your confirmation that you know how to measure roof pitch correctly, and it is worth the extra two minutes.
Method 2: From the roof edge (only if you are already up there)
If you are already on the roof for another reason — cleaning gutters, inspecting flashing — you can measure roof pitch the same way from the surface. Hold the level horizontally with one end resting on the roof surface, mark 12 inches along it, and measure vertically down from the mark to the roof surface. The number is your rise, and the pitch follows the same way.
Do not climb onto a roof just to measure roof pitch. The attic method gives the same number with none of the risk, and the ground method below gives it with no ladder at all. Roof falls are the leading cause of serious injury in residential roofing work, and a pitch reading is never worth that risk. If your attic is inaccessible and you cannot see a gable end from the ground, that is the point to call a roofer for an inspection rather than to climb up yourself.
Method 3: From the ground at the gable end
No attic access? You can still learn how to measure roof pitch from the ground, as long as your house has a gable end — the triangular wall beneath the peak of the roof — that you can see clearly.
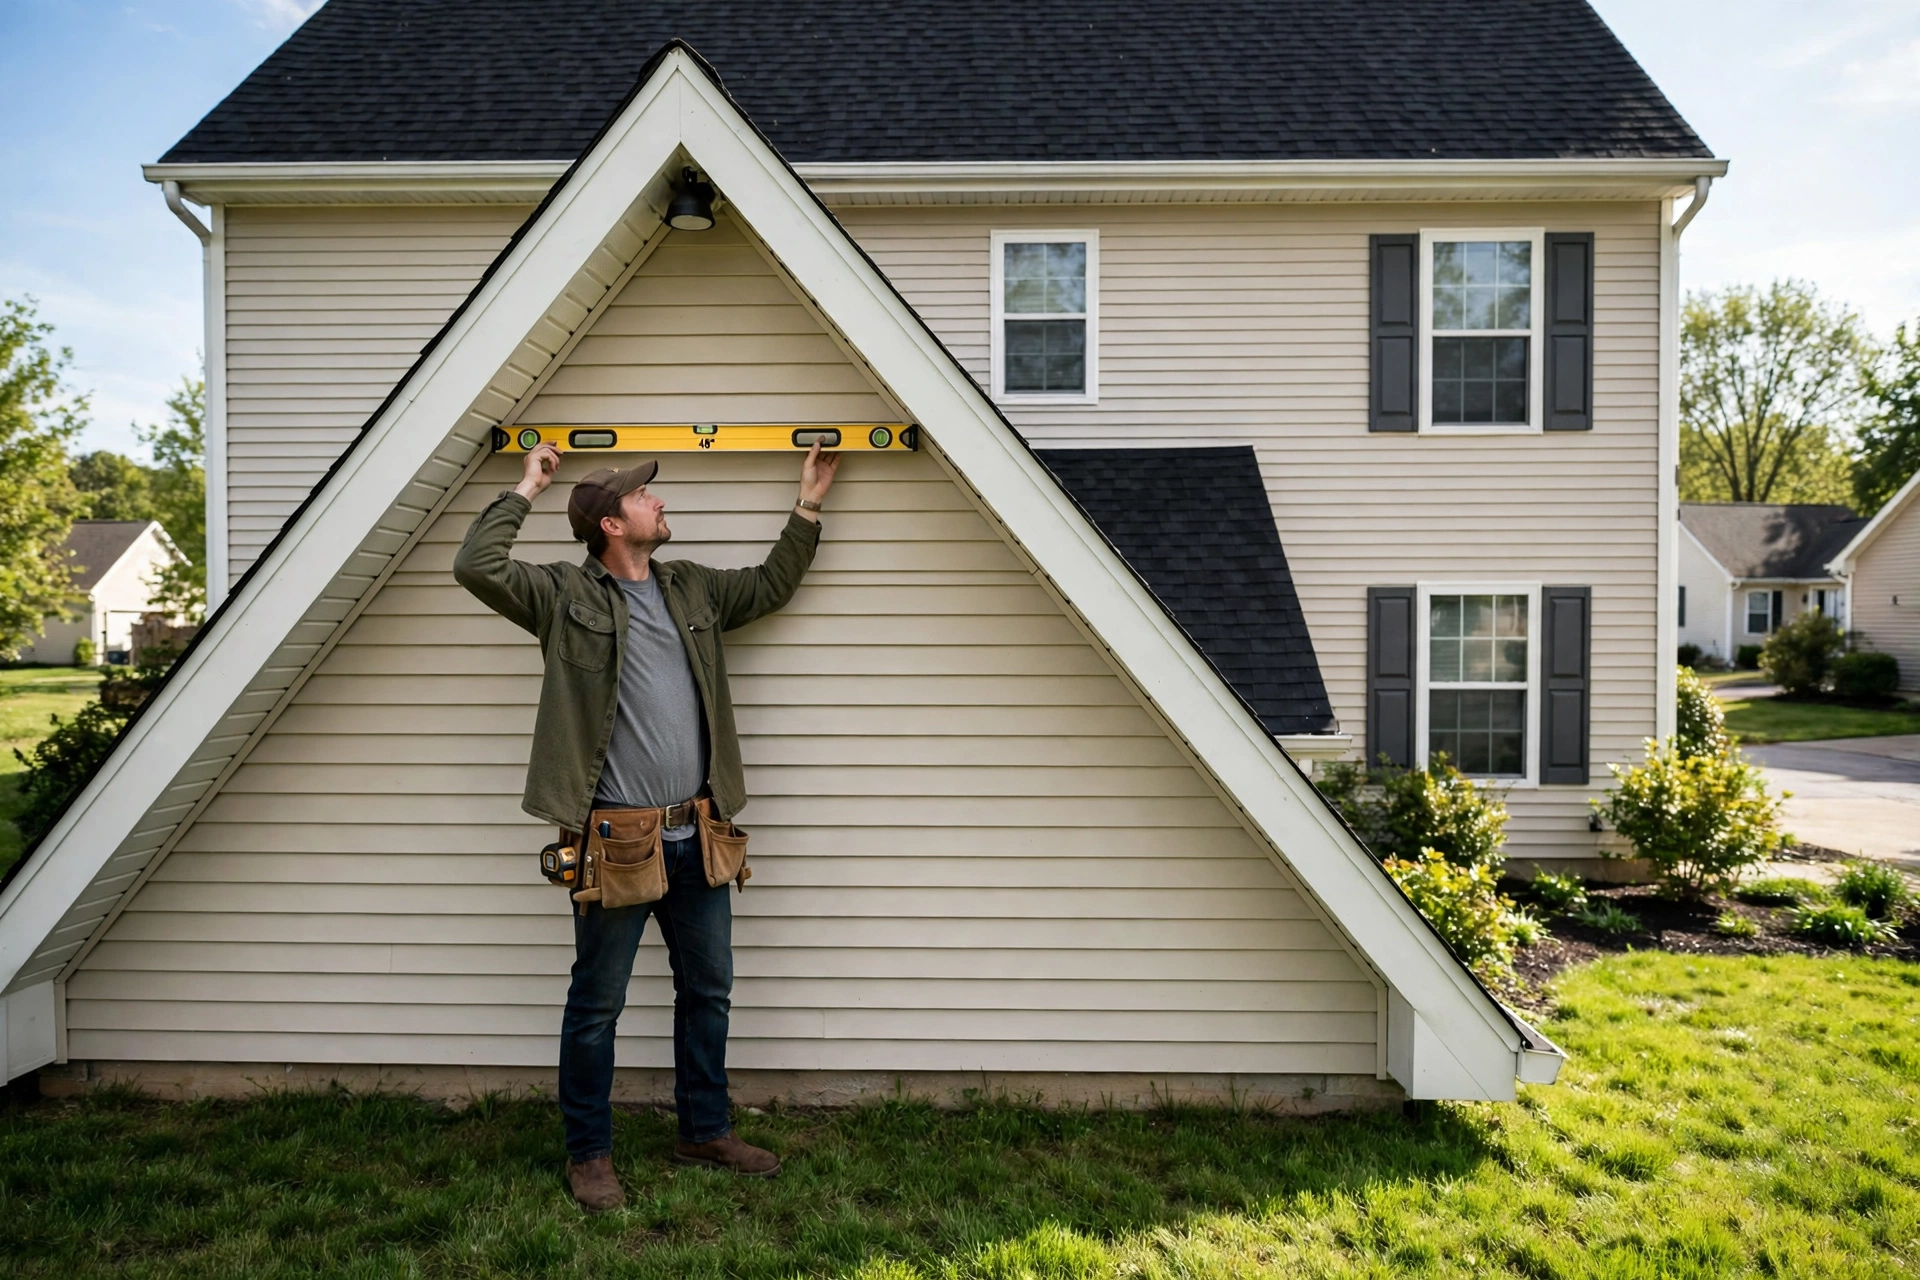
Stand where you can see the gable end face-on. Hold your level horizontally against the wall so that one end touches the visible roof edge where the roof meets the wall. Level it carefully, then measure the vertical distance from the far end of the level down to the roofline. The math is the same as the attic method, scaled to your level’s length: if you used a 24-inch level and the vertical drop is 12 inches, your pitch is 6/12, because 12 inches of rise over 24 inches of run is the same ratio as 6 over 12. In general, divide the vertical drop by the level’s length in inches, then multiply by 12. A 9-inch drop over a 24-inch level gives (9 ÷ 24) × 12 = 4.5/12.
This way to measure roof pitch is slightly less precise than the attic method, because you are sighting a line rather than touching a rafter, and a small error in holding the level horizontal shows up directly in the result. Take the reading twice, and if the two disagree by more than half an inch of rise, trust the attic method or a roofer’s measurement over this one.
Method 4: With a phone level app or angle finder
If you already know the angle of your roof, you can work backward and measure roof pitch without a level at all — and modern phones make that easy. Rest your phone flat on a rafter in the attic (or on the roof surface, if you are already up there safely) and read the angle from your level app. That angle, in degrees, is your roof’s slope angle. Convert it to X/12 with the table in the next section: 26.57 degrees is 6/12, 33.69 degrees is 8/12, and so on. A digital angle finder or a speed square with a built-in protractor works the same way and is often more accurate than a phone, because it sits flat against the rafter without wobbling.
Phone apps are a convenient way to measure roof pitch, but calibrate first. Lay the phone on a surface you know is level — a kitchen counter checked with a real level — and confirm the app reads zero. A phone in a thick case can sit slightly off, so take the case off for the reading if you can. And remember that the app gives you degrees, not X/12: you still need the conversion, which is the next section.
Converting pitch: X/12 to degrees, percent, and area multiplier
Once you know how to measure roof pitch in X/12, you will run into the other formats quickly — a shingle warranty talks about minimum slope in degrees, a building code talks in X/12, and a roofing estimate quietly uses the area multiplier to turn your home’s footprint into a roof area. Once you measure roof pitch, this table converts the result between all of them. The degrees come from the arctangent of the ratio (angle = atan(rise ÷ 12)), the percent is the rise divided by 12, and the area multiplier — the number that turns flat footprint into sloped roof surface — is the square root of (rise² + 12²) divided by 12.
| Pitch (X/12) | Angle (degrees) | Gradient (percent) | Roof-area multiplier |
|---|---|---|---|
| 2/12 | 9.46° | 16.7% | 1.014 |
| 3/12 | 14.04° | 25.0% | 1.031 |
| 4/12 | 18.43° | 33.3% | 1.054 |
| 5/12 | 22.62° | 41.7% | 1.083 |
| 6/12 | 26.57° | 50.0% | 1.118 |
| 7/12 | 30.26° | 58.3% | 1.158 |
| 8/12 | 33.69° | 66.7% | 1.202 |
| 9/12 | 36.87° | 75.0% | 1.250 |
| 10/12 | 39.81° | 83.3% | 1.302 |
| 11/12 | 42.51° | 91.7% | 1.357 |
| 12/12 | 45.00° | 100.0% | 1.414 |
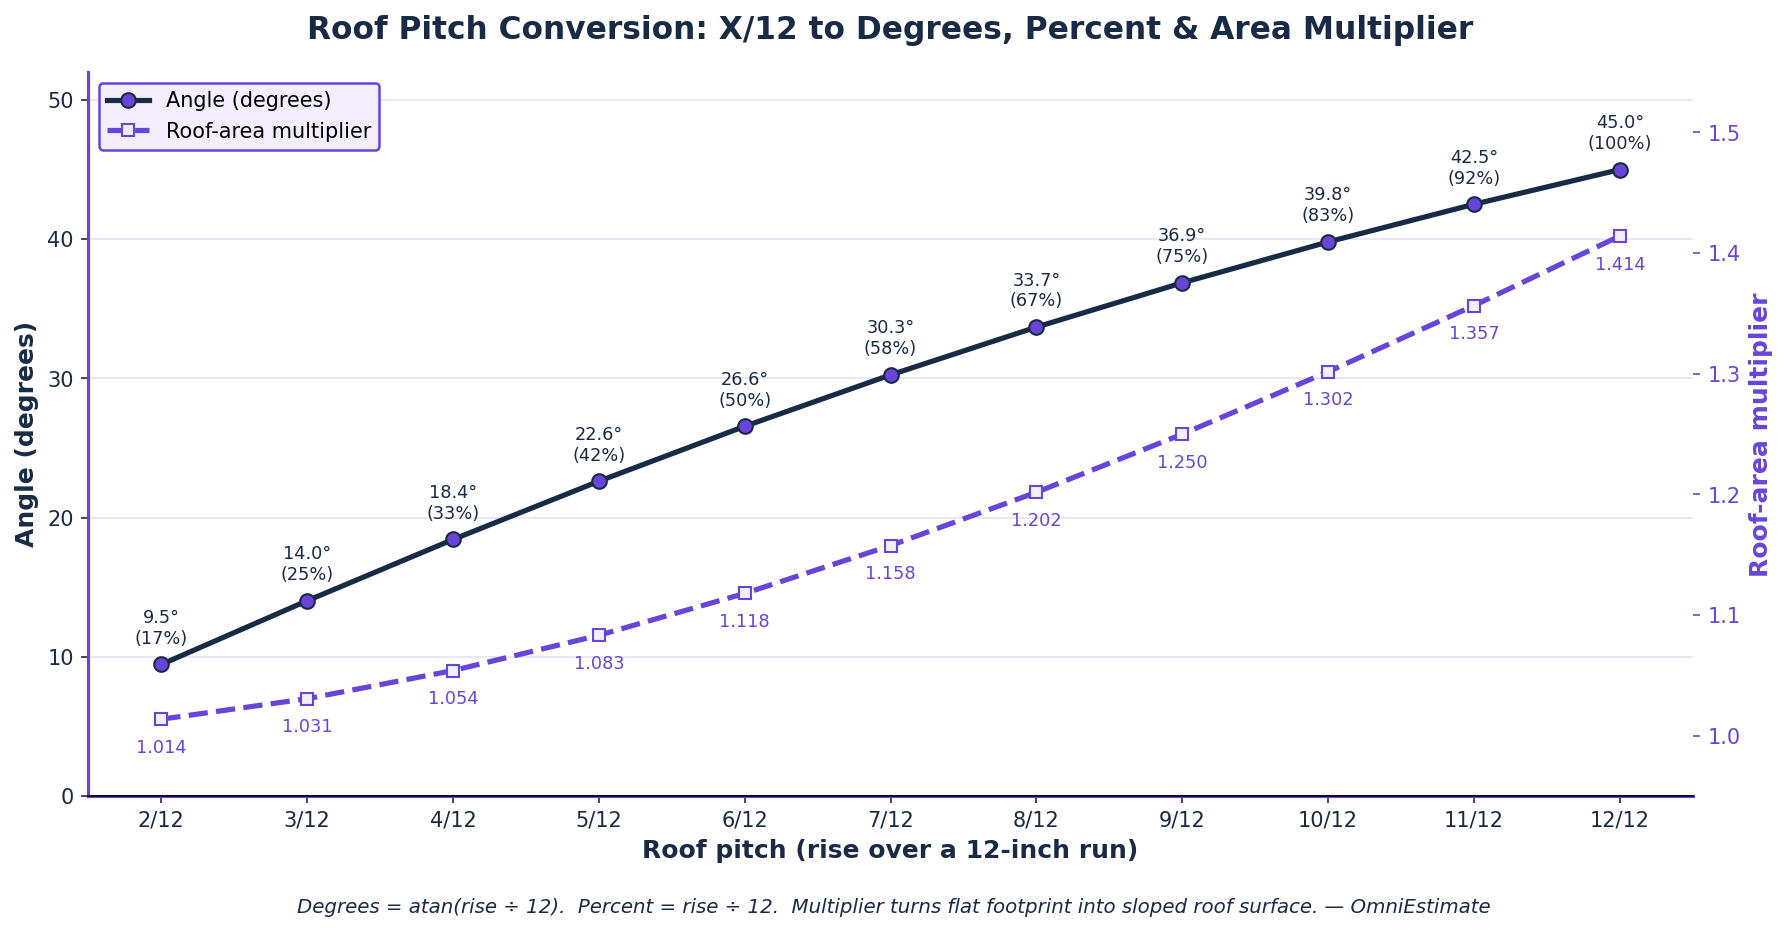
The multiplier column is the one that affects your wallet most directly. A 2,000-square-foot footprint under a 4/12 roof is about 2,108 square feet of roof surface; under a 12/12 roof, the same footprint is 2,828 square feet — a third more material, before a single shingle is priced. That is why two houses with identical floor plans can get very different roofing quotes, and why knowing how to measure roof pitch is worth doing before you collect estimates rather than after.
Why pitch matters: materials, codes, and cost
Pitch decides which roofing materials you can use. That is the practical payoff once you measure roof pitch: the number tells you what you can put on the roof. The International Residential Code (IRC R905.2.2) sets 2:12 as the minimum slope for asphalt shingles, and requires a double layer of underlayment for installations between 2:12 and 4:12. The National Roofing Contractors Association (NRCA) recommends slopes of 4:12 or more for asphalt shingle, tile, metal shingle, slate, and wood shake systems. Below 2:12, you are in membrane territory — TPO, EPDM, or built-up roofing — not shingles. If your measurement comes back at 3/12 and a contractor quotes standard shingles with a single underlayment layer, the code says that installation needs the double layer, and the quote should reflect it.
Once you measure roof pitch, the number also shapes cost in two ways. First, the area effect above: steeper roofs have more surface per square foot of house. Second, the labor effect: crews work slower and need more safety equipment on steep slopes, and some contractors add a steep-slope charge above 7/12 or 8/12. Neither effect is a reason to fear a steep roof — steep roofs shed water and snow better and tend to last longer — but both are reasons to measure before you budget. Once you have your pitch, the Roof Replacement Cost Calculator lets you see what a replacement costs for your roof size and material, and our guide to roof replacement cost explains how size, material, and labor fit together. If you are weighing materials, the metal roof cost guide covers the option that handles steep pitches best.
Common mistakes when measuring roof pitch
Most errors when people measure roof pitch come from one of five slips:
Measuring along the slope instead of horizontally. This is the most common error when people measure roof pitch, and it always overstates the pitch, because the distance along the slope is longer than the horizontal run. The level must be horizontal, and the tape must be vertical. If either one follows the slope, the number is wrong.
Using the wrong run. The standard run is 12 inches, and the pitch is defined against it. If you measure over a different run — a 24-inch level, for example — you must scale the result, as shown in the ground method above. A 12-inch rise over a 24-inch level is 6/12, not 12/12.
Measuring a dormer or a valley. Dormers, additions, and valleys often sit at a different pitch from the main roof. Measure the main roof’s rafters, not the first sloped surface you find. If your house has two visibly different slopes, measure both and report both — a roofer will want to know.
Trusting a single reading. Wood moves, levels drift, and eyes misread tapes. Two agreeing readings at different rafters are the minimum when you measure roof pitch for a number you will hand to a contractor. If two readings disagree, a third breaks the tie.
Forgetting the overhang. Pitch is about slope, not size — but when you go on to estimate roof area from your footprint, remember that the roof extends past the walls. The footprint you multiply by the area factor should include the overhangs, or your area will come up short.
Frequently asked questions
What is the easiest way to measure roof pitch?
The attic method is the easiest reliable way: hold a level horizontally against the underside of a rafter, mark 12 inches along the level, and measure straight up from the mark to the rafter. The vertical distance in inches is your rise, and the pitch is that number over 12. It takes about ten minutes, needs no ladder, and measures the structure itself.
Can I measure roof pitch without climbing on the roof?
Yes. The attic method needs no climbing at all, and the gable-end method works entirely from the ground — hold a level horizontally against the gable-end wall at the roof edge, measure the vertical drop at the far end of the level, and scale the result to a 12-inch run. Never climb onto a roof just to measure its pitch.
How do I measure roof pitch with a level?
Rest one end of a level (12 inches or longer) against the underside of a rafter in the attic and adjust it until the bubble reads level. Mark the 12-inch point along the level, then measure vertically from that mark up to the rafter with a tape measure. If the vertical distance is 6 inches, your pitch is 6/12. Repeat at a second rafter to confirm.
What does a 6/12 roof pitch mean?
A 6/12 pitch means the roof rises 6 inches for every 12 inches of horizontal run. In other formats, that is a 26.57-degree angle and a 50 percent gradient. It is one of the most common residential pitches in the United States — steep enough to shed water well, shallow enough to walk on comfortably.
How do I convert roof pitch to degrees?
Take the arctangent of the rise divided by 12: angle = atan(rise ÷ 12). For a 6/12 pitch, atan(6 ÷ 12) = 26.57 degrees. The conversion table in this guide lists every common pitch from 2/12 (9.46 degrees) to 12/12 (45 degrees), along with the percent gradient and the roof-area multiplier.
What is the minimum roof pitch for asphalt shingles?
The International Residential Code (IRC R905.2.2) sets 2:12 as the minimum slope for asphalt shingles, with a double layer of underlayment required for slopes between 2:12 and 4:12. The National Roofing Contractors Association recommends 4:12 or more for asphalt shingle systems. Below 2:12, use a membrane system such as TPO or EPDM instead of shingles.
Does roof pitch affect replacement cost?
Yes, in two ways. A steeper roof has more surface area per square foot of house — a 12/12 roof has about 41 percent more surface than a flat roof over the same footprint — so it needs more material. Steep roofs also slow crews down and require more safety equipment, which adds labor cost. To see the effect on your own roof, run your numbers through the Roof Replacement Cost Calculator.
The bottom line
Knowing how to measure roof pitch is a ten-minute job that pays off every time roofing comes up — quotes, materials, permits, and insurance conversations all start from this number. Measure roof pitch before you collect quotes, not after — the number changes what contractors can offer and what your roof will cost. Measure from the attic if you can, from the ground if you cannot, and never from the roof unless you are already up there for another reason. Take two readings, trust them only when they agree, and keep the number somewhere you can find it. When you are ready to see what the number means for your budget, the Roof Replacement Cost Calculator turns your pitch, size, and material choice into a real estimate.
